Showing posts with label DIY. Show all posts

Bubbling Bath Salts


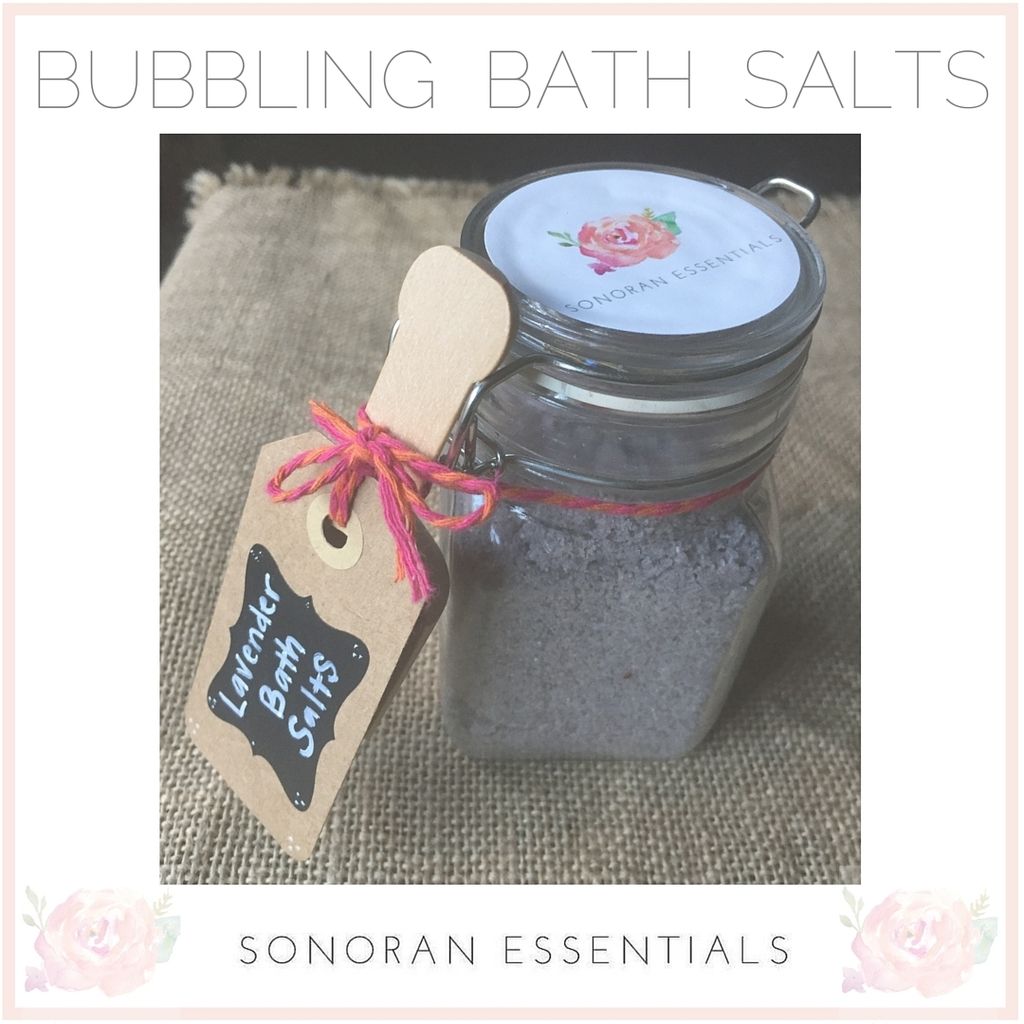
Homemade bath and body products are my absolute favorite!! They are so  much fun and also inexpensive to make. Depending on the season, holiday, or occasion you can mix and match colors and scents as needed. These products also make great gifts. They are so simple to make, just about anyone can do it. My 6 year old made the salts pictured for his teacher on her birthday. He had a blast making them and really felt like he was doing something special for her. As expected, she loved receiving a homemade gift from her student!

Soaking in the bath, in general, provides many health benefits. It promotes healthy circulation, perspiration, and relaxation. Taking baths also aids in the removal of dead skin cells that can block pores and lead to unsightly bumps and blemishes on your body. Through the process of dermal absorption, or absorbing nutrients through the skin, your body is able to absorb minerals more effectively than consuming the minerals orally.

Ingredients:
  • 1 cup Epsom salt
  • 1/2 cup Himalayan sea salt
  • 1/4 cup baking soda
  • 3 tablespoons Body Wash (I used Dr. Bronners Baby Wash)
  • 1 teaspoon coconut oil
  • Optional: Food Coloring (I used a few drops of gel food coloring)


Essential Oils:
  • 20 drops essential oil of your choice (I used Lavender for this batch)
I only use therapeutic grade essential oils that are safe for consumption.
For more information on how to purchase these oils, please feel free to contact me.)

Instructions:
Combine body wash, coconut oil, essential oils, and food coloring (if using) in a large mixing bowl.

Add Epsom salt, Himalayan sea salt, and baking soda to mixture.

Mix until well combined.

Spread mixture out to dry on a large baking sheet.

Allow mixture to dry for about 24 hours.

Add mixture to container of your choice. We used a glass jar and attached a spoon for scooping out the bath salts.

Add desired amount to warm bath, and enjoy!

Mixture keeps for about 3 months. 

Nerdy Extras:
Epsom salt is not actually a salt, but a mineral compound of magnesium and sulfate. To see the health benefits I listed in a previous post, click here. Sulfates help to improve absorption rates of nutrients, while flushing out toxins. Sulfates are also know to ease pain associated with headaches and migraines.

Himalayan sea salt benefits include supporting healthy weight loss, easing muscle pain, detoxifying, and hormone balancing.

Baking soda, aka sodium bicarbonate, provides alkalinity and aids in removing toxins from the body. It also helps to make bathwater feel silky.


FDA Disclaimer: "These statements have not been evaluated by the Food and Drug Administration. This product is not intended to diagnose, treat, cure, or prevent disease."

Sugar Scrub

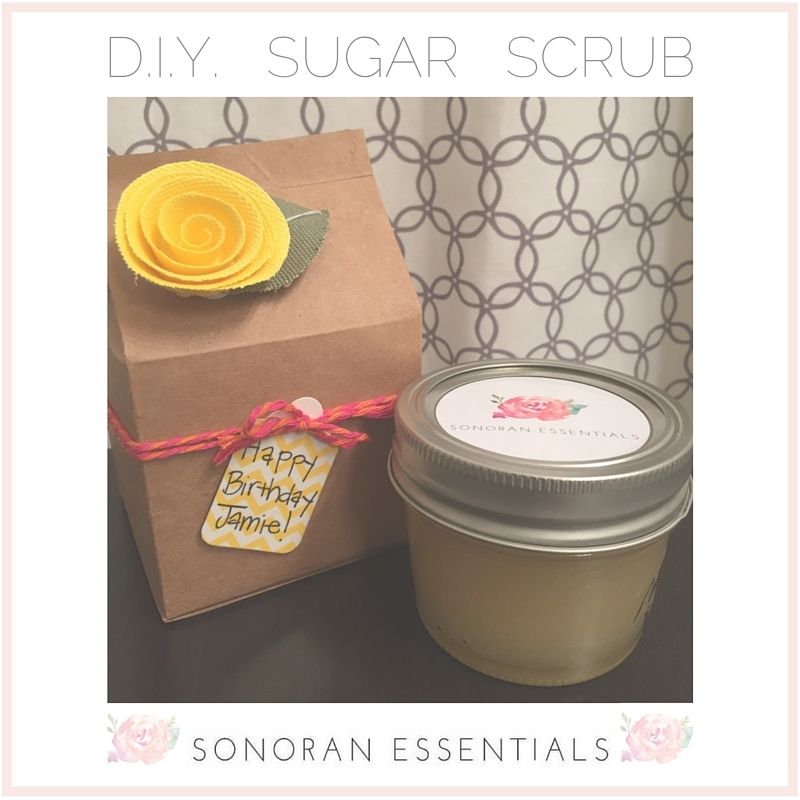
I love a good sugar scrub because they are moisturizing, exfoliating, and help improve circulation. They are effective in both smoothing the skin, and helping reduce cellulite and bumps. You can use the scrubs on your body and feet to reveal silky soft skin. There are many variations of sugar scrubs, and they are amongst the most simple DIY beauty recipes to make. If you are new to making your own products, this is a fantastic one to try to get your feet wet.  It's virtually impossible to mess up a scrub, and it only takes minutes to make. Sugar scrubs are sold in stores for much more money they are worth in my opinion. Afterall they only costs pennies to make. Convinced to give it a try? Go ahead; get your scrub on! 

Ingredients:
  • 1 cup brown sugar, preferably organic
  • 1/2 cup avocado oil
  • 1 tablespoon honey


Essential Oils:

  • 20 drops of essential oil of your choice (I used Orange for this scrub)

(You could also completely omit the essential oils. I only use therapeutic grade essential oils.
Please avoid using fragrance oils, as they are chemical fakes & can cause irritation & allergic responses.
For more information on how to purchase these oils, please feel free to contact me.)


Instructions:
Mix all ingredients together and store in an airtight container.

Use 1-2 tablespoons as needed in the shower or bathtub.

I have found that while showering the water rinses the product away too quickly. Therefore I personally prefer the bathtub, because I have better control of the scrub.

After your body is wet, simply apply and scrub, scrub scrub!

I like to scrub all over, rubbing harder on the rougher parts of your skin.

Then simply rinse and admire your soft exfoliated skin.

Don't forget to follow up with a good moisturizer.

Nerdy Extras:
Sugar is a natural source of glycolic acid, an alpha hydroxy acid (AHA), encouraging cell turnover & exfoliation. Sugar also has natural humectant properties, thus are very hydrating. Additionally, brown sugar is softer than granulated sugar, making it an excellent choice for sensitive skin.

Avocado oil contains protein, fats, antioxidants, & potassium. It has antioxidants like Vitamin A, D, & E help moisturize the skin & keep it soft & supple. It helps relieve dry, scaly, itchy skin, & aids in collagen production. It's highly moisturizing making it an excellent choice for dry & aging skin, & for those with eczema & psoriasis.

Orange essential oil is antiseptic & anti-inflammatory. It has been shown to increase the ability to absorb vitamin C, aid in collagen production, & increase blood flow; all of which are essential for the skin. It is also helpful at soothing dry & irritated skin, & excellent in helping to remove calluses.  In addition it also has aromatic benefits, as it is very relaxing & uplifting.

Honey is a natural humectant loaded with nutrients, antioxidants, enzymes, and healing compounds that nourish, cleanse, and hydrate the skin.

Humectants draw moisture from the air into the skin & ensure it's retained it in the layers of the skin where moisture is most needed for penetrating, long-lasting hydration.


FDA Disclaimer: "These statements have not been evaluated by the Food and Drug Administration. This product is not intended to diagnose, treat, cure, or prevent disease."

Remineralizing Toothpaste


After having some surprisingly bad news at the dentist, I was looking for a re-mineralizing toothpaste to help with tooth decay and dental regeneration. I wanted something that was fluoride-free, glycerin-free, preservative-free, and free of foaming agents and artificial coloring and flavoring. I found a brand of toothpaste called Earthpaste that fit the bill.

I noticed the toothpaste only had a few very basic and natural ingredients. So I got to thinking, this is unbelievably simple. Why can't I make this myself? So I gave it a try. The results have been amazing. I fiddled around with the recipe a bit, and ended up with one I'm sharing with you today after some trial and error. I just love the way it makes your mouth feel so clean. It is smooth and creamy, but not too thick. My teeth seem whiter and are not as sensitive to cold and heat. I have yet to go to a checkup at the dentist, but I will update you all when I have more to share on that.

This toothpaste is even kid-approved. My 6 year old doesn't want to use any other toothpaste now. I'm happy because, well I'm frugal - and I'm saving a ton of money on toothpaste. Like most DIY's, startup costs can be a little steep, but in the long run it ends up only costing a fraction of the amount.

Prevention is everything, and good oral hygiene, a healthy diet, and eating less sugar is obviously the best way to avoid a cavity. If you think you have a cavity, go to the dentist and get checked out. This recipe is not meant to replace proper dental care. I am simply using it as a more natural means to clean my teeth, and in hopes that the small problems I am currently having with my teeth can be resolved over the next few months before my next 6 month checkup.

Ingredients:
  • 1/4 cup of Redmond (bentonite) Clay
  • 1/4 cup of boiling distilled water
  • 1 tablespoon of coconut oil
  • 1/4 teaspoon of Real Salt
  • 1/2 teaspoon of xylitol


Essential Oils:
  • 15 drops of Protective Blend Essential Oil
  • 10 drops of Peppermint Essential Oil
(I only use therapeutic grade essential oils that are safe for consumption.
For more information on how to purchase these oils, please feel free to contact me.)

Instructions:
  • Using a glass container, bring water to a boil
  • Add the salt and xylitol, stirring until the ingredients have been completely dissolved.
  • Add the coconut oil, stirring until the mixture becomes a liquid.
  • Add the bentonite clay, stirring until well combined.
  • Let cool completely
  • Add your essential oils last, and stir.
  • You can prepare this in the glass container you plan on storing the toothpaste in. Or you can pour mixure into smaller glass jars, so that each person in your home as an individual jar of their own toothpaste.
  • To use the toothpaste, simply dip your toothbrush in the jar and apply a small amount to bristles. Or if it sounds better, use a small wooden spoon to apply to your toothbrush instead.
WARNING: You are never supposed to use metal utensils with bentonite clay
because the metals can leach from the utensils and be pulled into the clay.

Nerdy Extras:
Bentonite Clay draws toxins, chemicals, impurities, and heavy metals from the gut, skin, and mouth, The clay absorbs the liquids that it comes into contact with, and expands to extract the toxins from the liquid. It is composed of many minerals including calcium, magnesium, silica, sodium, copper, iron, and potassium. When used in toothpaste, the clay binds to unhealthy substances in the mouth, such as around the teeth and on the tongue and gums, and helps remove them before you swallow them and become sick. For these reasons, along with its high antibacterial properties, it is the most beneficial ingredient in this re-mineralizing toothpaste.

Coconut Oil is effective in getting rid of viruses and bacteria in mouth.

Real Salt is unrefined and full of natural minerals.

Xylitol is a natural sweetener derived from the fibrous parts of plants. It does not break down like sugar and can help keep a neutral pH level in the mouth. It also prevents bacteria from sticking to the teeth. This is how it protects the teeth from tooth decay.

Protective Blend Essential Oil is full of antibacterial properties and is known for eliminating germs and helping reduce cavities. 

Peppermint Essential Oil has many properties including antibacterial, anti-carcinogenic, anti-inflammatory, antiseptic, and antiviral. It has been proved to be more effective at preventing dental plaque formation than your typical antiseptic.1

References
1. Rasooli I, Shayegh S, Taghizadeh M, Astaneh SD (2008 Sep.) "Phytotherpeutic prevention of dental biofilm formation," Phytother Res. 22(9):1162-7

FDA Disclaimer: "These statements have not been evaluated by the Food and Drug Administration. This product is not intended to diagnose, treat, cure, or prevent disease."


Are You Magnesium Deficient?

Magnesium is an important, low-cost, trace metal that is crucial to proper body functioning. Due to our modern diets of processed and nutrient deficient foods and soils, magnesium deficiency is a rising problem.

A government study shows a staggering 80% of Americans do not consume the recommended daily intake of magnesium. Even more alarming, data from this study suggests that 19% of Americans do not consume even half of the governments recommended daily intake of magnesium. 1

Below are a few specific reasons we should try to achieve the recommended daily intake of magnesium:

  • It is beneficial for promoting optimal nerve function
  • It can alleviate muscle aches and pains, reducing inflammation, improve blood flow and circulation, and supports a positive mood
  • It can help support and alleviate conditions like insomnia, migraines, ADD/ADHD, constipation, anxiety, depression, and chronic fatigue
  • It has also been know to help with cramps, nausea, and body odor as well.

"Magnesium is needed for more than 300 biochemical reactions in the body. It helps maintain normal muscles and nerve function, keeps the hearts rhythm steady, supports a healthy immune system, and keeps bones strong. Magnesium also helps regulate blood sugar levels, promotes normal blood pressure, and is known to be involved in energy metabolism and protein synthesis. There is an increased interest in the role of magnesium in preventing and managing disorders such as hypertension, cardiovascular disease, and diabetes."2

Doctors eagerly write millions of prescriptions each year for expensive patented drugs for nervousness, irritability, and jitters largely brought on by inadequate intake of magnesium. You only need to be SLIGHTLY deficient in magnesium to become irritable, high-strung, over-excitable, belligerent, sensitive to noise, and apprehensive. By allowing these symptoms to go untreated, you could develop twitching, jerkiness, tremors, irregular pulse, leg and foot cramps, muscle weakness, and insomnia. I find it alarming that doctors prescribe expensive drugs to treat these symptoms when a low-cost alternative like magnesium is readily available.


Signs of Magnesium Deficiency:
  • Extreme thirst
  • Extreme hunger
  • Sugar cravings
  • Frequent urination
  • Body odor
  • Mental disturbances
  • Anxiety, panic attacks
  • Depression
  • Irritability
  • Brain fog
  • Moodiness
  • Dizziness
  • Headaches
  • Sensitivity to lights and sounds/noises 
  • Insomnia
  • Nightmares
  • PMS
  • Infertility
  • Muscle malfunction (tightness, cramping, weakness)
  • Heart flutters and/or palpitations
  • Heart arrhythmia's
  • Angina (due to spasms in coronary arteries)
  • High blood pressure
  • Thyroid issues
  • Digestive issues (including constipation)
  • Bad circulation (cold hands and feet)
  • Tingling toes/fingers
  • Low blood sugar
  • Insulin resistance
  • General (unexplained) pain
  • Back and joint aches/pains
  • Bad breath
  • White/yellow/gray coating on tongue
  • Cavities and tooth decay
  • Allergies
  • Shortness of breath
  • Nerve pain
  • Stroke
  • Blood clots
  • Kidney and bladder concerns

As you can see, the list for signs of magnesium deficiency is long and concerning. So I consider it very important to make sure my household tries to maintain proper magnesium levels. I like to keep things simple and natural so I try my best to include things in my diet that are high in magnesium. An easy way to remember what foods are good sources of magnesium is to think of fiber. Foods that are high in magnesium are usually also high in fiber.

Foods high in magnesium:

  • Dark leafy greens (especially broccoli and squash)
  • Whole grains
  • Seeds and nuts (especially almonds)
  • Beans

I have tried a few ways to increase magnesium intake outside of diet. I tried a liquid magnesium supplement, Epsom salt, and magnesium gel. While I enjoyed the ease of being able to add the liquid magnesium supplement to my water, magnesium can cause stomach sensitivity when ingested directly. Loose stool is a common symptom of improper digestion of magnesium, or a sign that you have gone over your magnesium intake.

Your skin is the largest organ in your body. It acts like a revolving door, allowing elements to pass through both ways. Anything that touches your skin, good or bad, is absorbed in or moved out (via sweat). When nutrients like magnesium are applied directly onto the skin, the benefits are amplified. I love taking advantage of this! Therefore, I enjoy topical applications of magnesium best, as it seems to be the most effective method for me. Stay tuned for my magnesium DIYs!


References
1. King D, Mainous A 3rd, Geesey M, Woolson R. Dietary magnesium and C-reactice protein level. J Am Coll Nutr. 2005 Jun 24(3):166-71
2. Available at: http://ods.od.nih.gov/factsheets/magnesium.asp. Accessed June 6, 2005

FDA Disclaimer: "These statements have not been evaluated by the Food and Drug Administration. This product is not intended to diagnose, treat, cure, or prevent disease."


How to Remove Melted Crayon from Clothes & Clothes Dryers


This is not my typical post. I like to keep what I post here relevant to health and beauty, and not talk about personal things like my children too much. But this is an exception I had to make. Only because this was such a life saver.

I only do four loads of laundry a week; whites, brights, darks, and towels/sheets. So when I do laundry, I have very full loads. I had pulled a load of darks from the drier and began to fold. I noticed immediately that my sons shorts were covered in blue goop. I was a little disappointed, thinking his brand new shorts got ruined the first time he wore them to school. So I folded them and grabbed another handful of clothes to fold and noticed bright blue marks on my scrubs, followed by my husbands tee shirts. Things were not looking good. As I started to frantically look through the pile of freshly cleaned clothes, I began to realize that almost every single article of clothing in this large size load were covered in blue. I walked over to the dryer, and sure enough the inside was, you guessed it, completely BLUE! Ugh!

My husband was about to toss the entire load of clothes in the trash, chalking this up as yet another right of passage into parenthood. I couldn't stand the idea of not even trying to fix the laundry, after all, these are things we need and use every week. So, just like that, Google came to the rescue. Seriously, what did people do before the internet?!? Anyway, I got some great info from the site Thrifty Fun and came up with my own plan of attack. Great news is, 90% of the clothes have been saved, and the clothes dryer is now functioning normally!

My husband and I are in complete disbelief that we got out of this whole situation without needing to repurchase another dark-clothes wardrobe. It could have ended A LOT worse.

My first piece of advice after this experience:  if you don't already, start checking your kids clothing pockets before you put them in the wash.  The easiest way to deal with a mess like this is to avoid it all together.  But, if you happen find yourself in this undesirable position, don't worry - just follow these simple (yet somewhat labor intensive) steps and be on your way to stain-free clothes.

Good Luck! I sincerely hope this protocol works as well for you as it did for me! Please comment below if you have other tips on removing melted crayons from clothing.

And don't forget, check those pockets before washing!!!


Supplies Used to Clean the Clothes:
  • Pre-Treat stained areas with Krud Kutter
  • 1 full cup of your regular laundry detergent
  • 1/2 cup vinegar
  • 1/2 cup dish washing soap
  • 3 pots of boiling water

Supplies Used to Clean the Clothes Dryer:
  • Krud Kutter
  • Soft Scrub
  • Sponges with abrasive side
  • Cleaning towels or old rags
  • Gloves

Instructions:
  • First step is to turn the water heater in your house up as high as it will go.
  • Then unplug your washing machine.
  • Pre-treat all of the crayon spots on clothing with Krud Kutter.
  • Bring a large pot of water to a boil.
  • Add 1/2 cup vinegar, 1/2 cup dish soap, and a full cup of your regular laundry detergent to the clothes washer. 
  • When the water begins to boil, add it to the washer machine. Repeat this two times.
  • Add clothes to the wash, plug the washer back in, and wash on the hottest possible setting.

This alone removed 80-90% of the melted crayon on the clothes!
We ran a second load, just like this one, for the clothes with stubborn crayon stains.
Half of those came out clean after the second washing.
The clothes leftover, well, we chalked them up to a loss. 
You could also get some parchment paper and iron the crayon stains.
Make sure not to use the steam function for this, as it will set the crayon even further.

  • While the clothes are washing, get started cleaning the clothes drier if necessary (which it definitely was for us!).
  • First get out your cleaning gloves, you will need them!
  • Run your drier (empty) for about 10-15 minutes to get it nice and warm on the inside, loosening up any leftover crayons bits to make removing it a little easier.
  • Dampen the abrasive side of your sponge with water. 
  • Generously apply Soft Scrub to the inside of the drier and scrub with wet sponge. You are going to want to to make sure you get into all of the cracks, especially near the paddles.
  • Apply soft scrub to the vented area in the back of the drier. You can use a sponge for this, but an old toothbrush works great too.
  • Wipe away excess Soft Scrub with damp rag, repeat, repeat, repeat.
I'm not going to lie, this is tedious!
  • Get Krud Kutter, spray inside of the drier, and go over with a sponge.
  • Spray Krud Kutter into the cracks of the drier in the back. Get a rag and run it around in circles around the perimeter, making sure to remove any excess crayons. For this I also used an old toothbrush, because my drier had a ton of crayon lodged into this part.
  • After cleaning, run a load of rags in the drier.  If they come out clean, then you are good to go. If not, you may have to repeat the whole process over again. Sigh.
Don't forget to turn your water heater back down to your normal setting!

What did not work:
  • Magic Eraser
  • Clorox Wipes


Hard Lotion Bars


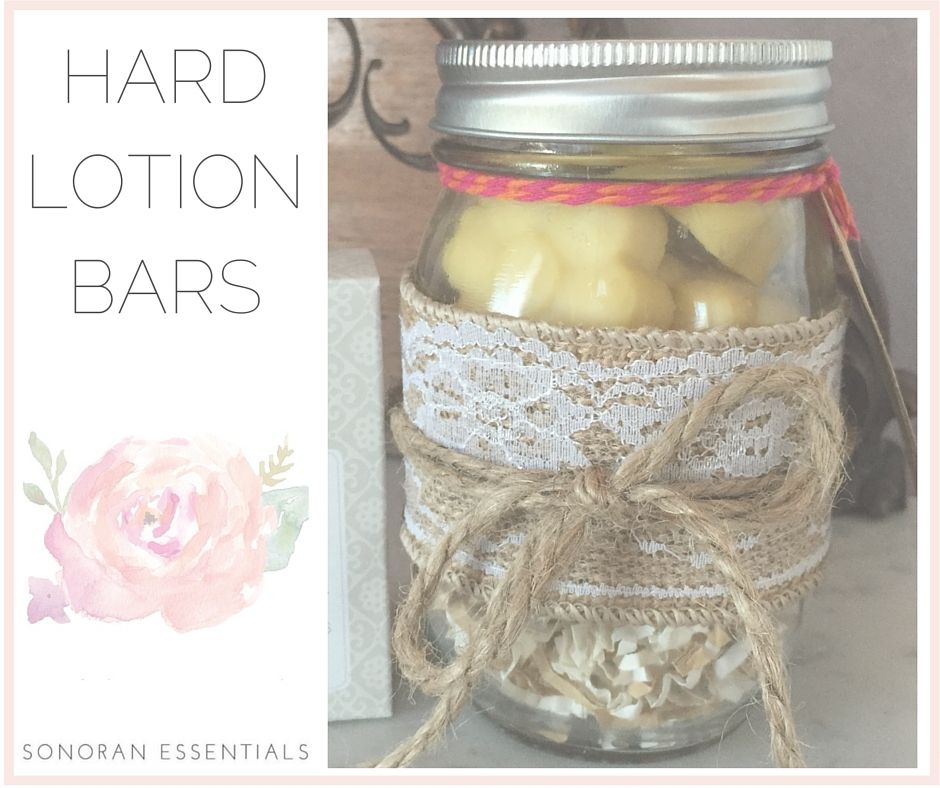
I was initially inspired to make these lovely hard lotion bars due to the very hot and dry weather here in Arizona. My skin is naturally on the dry side, so living out here just made it worse. I needed a lotion that was able to keep my arms, legs, hands, and feet looking moisturized all day long. These little bars do exactly that! Now, I warn you, this is not a light moisturizer. This is a very heavy moisturizer, and a little bit goes a long way. I tend to have sensitive skin with certain lotions, but this lotion has yet to give me any problems after having used it for months. That being said, I'm clearly a big fan of these powerful little lotion bars. I liked them so much that I thought they would make great gifts, so that's exactly what I did. I really enjoy making homemade products, it's a lot of fun to me. Sure, it may take more time, but it's so original and you can really customize your products based on the needs of the person you are making it for.  Plus, it's economical once you are all stocked up on all of your basic DIY materials.

Shea Butter is a softer butter, so these bars will be a little softer, which is why I recommend storing them in the refrigerator until ready to use. Especially if you live somewhere hot like me! The beeswax smell does tend to overpower the smell of the oils. Despite lacking an aroma, the essential oils are still in there, providing the same level of therapeutic value.


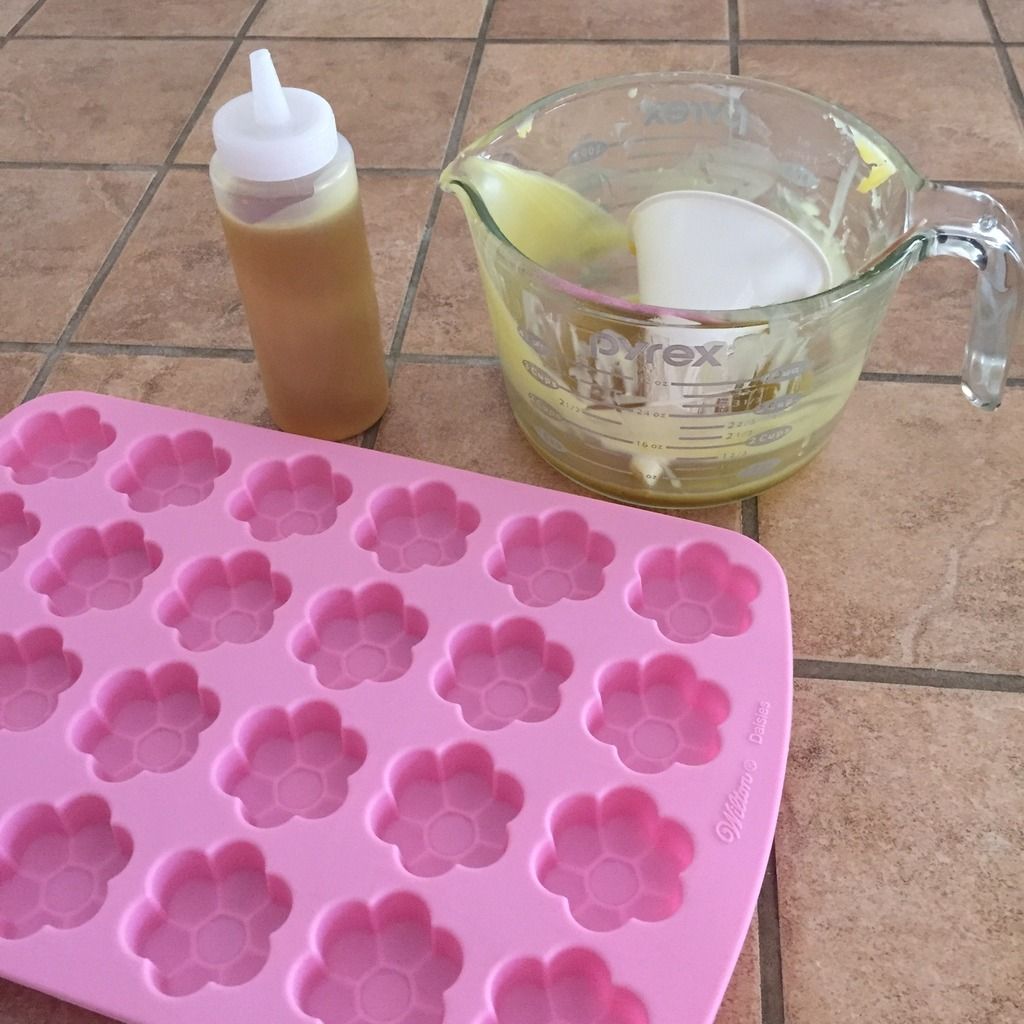
Before you embark on this DIY mission, you are going to need a silicone treat mold, This recipe makes 2-3 dozen mini lotion bars, depending on the size of the mold. I recommend sticking to smaller mold sizes. I also recommend not making thin lotion bars, as they will not hold up well when applying them.

Ingredients:
  • 2/3 cup Beeswax 
  • 1/2 cups Coconut Oil
  • 1/2 cup Shea Butter 
  • 1 teaspoon Vitamin E Oil (approximately 4 capsules)
 

Essential Oils:
  • 20 drops of an essential oil of your choice.
...Lavender, peppermint, and citrus are always popular choices...
(I only use therapeutic grade essential oils that are safe for consumption.
For more information on how to purchase these oils, please feel free to contact me.)
Instructions:
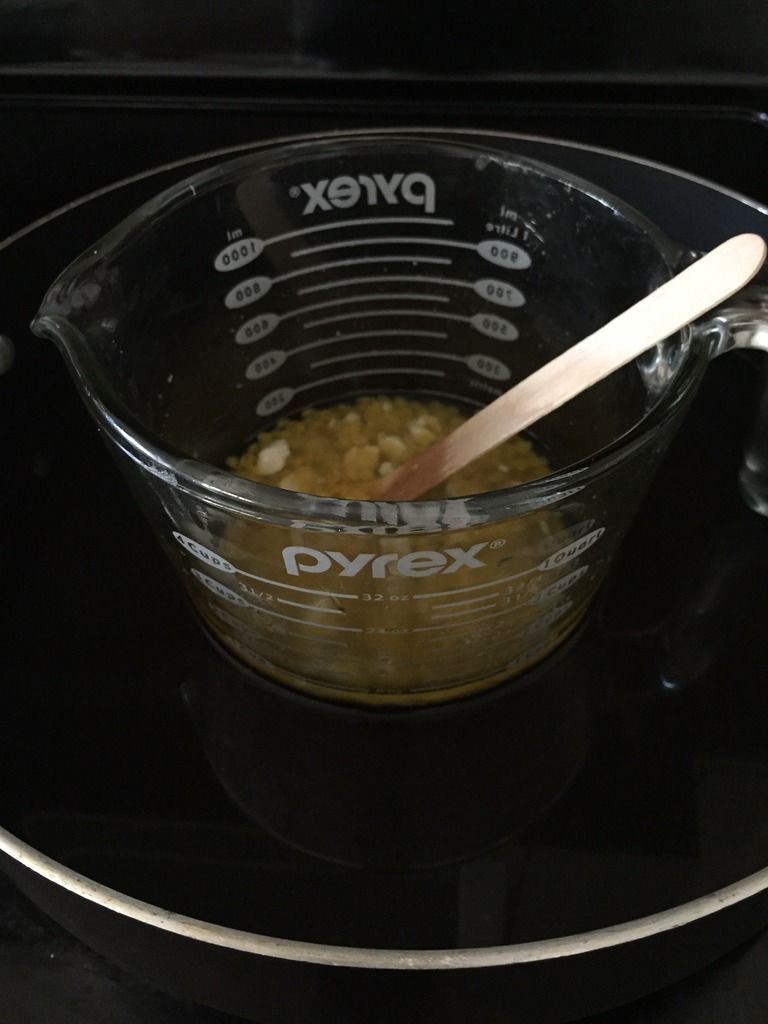
  • Measure the beeswax, coconut oil, shea butter, and vitamin E in a glass jar. I used a glass Pyrex container, but anything glass or metal would work just fine.
  • Fill pan with about two inches of water. Bring to a boil. 
  • Place Pyrex container with ingredients into the boiling water. This is an important step. You want to do this to avoid having the ingredients get too hot, or use a double boiler.
  • Bring heat down to a simmer. You don't want to overcook the lotion.
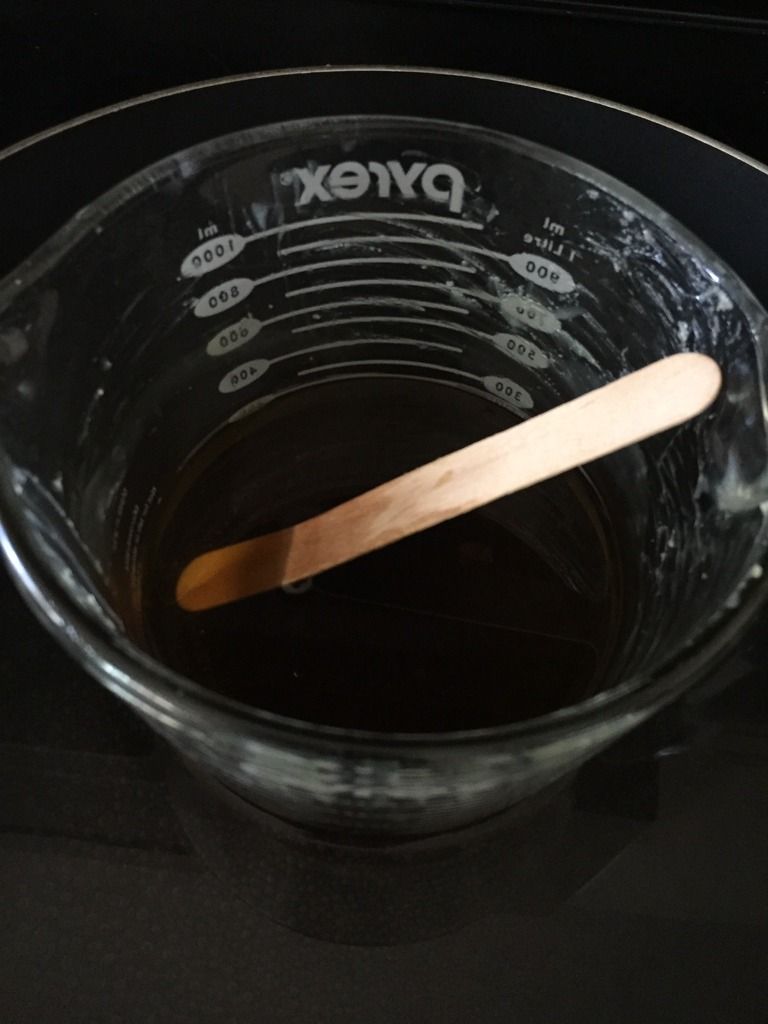
  • Stir ingredients until combined. Should take about 10-20 minutes. I used a wood craft (Popsicle) stick to stir, so that I could just toss it in the trash when done.

  • Once the lotion has been melted, remove it from the heat, and let it sit until the glass jar is no longer hot to the touch. Approximately 2-3 minutes.
  • When the lotion is cooled, add about 20 drops of essential oil and stir.
  • You could do one of two things here. You could pour the lotion directly into the silicone mold, or you could do what I did and pour the lotion into a wide mouth squeeze bottle (like this). It was so much easier to just squirt the lotion into the molds this way. Clean up was a breeze, too.
  • Once all of your molds are filled, let them harden for at least 3 hours, preferably in the refrigerator.
  • Remove the bars from the tray, and place them in a glass jar or ziplock bag in the refrigerator until ready to use. You could also store them at room temperature if you live in a cooler climate. 
  • When you are ready to use the lotion bars, simply rub them on the areas of your skin needing extreme moisture. 

Nerdy Extras:
Beeswax acts as a surfactant, meaning it acts as a barrier on the skin when blended into a cream or lotion. This barrier protects the skin from irritants, while still allowing the skin to breathe.

Coconut oil is a wonderful, and wildly popular, all-natural base for many DIY skincare and wellness practices. When applied to the skin, it absorbs into your skin and connective tissues, keeping them strong and supple, thus helping to reduce the sign of aging. It also helps exfoliate the outer dead layers of skin, making skin appear smoother.

Shea butter is extracted from the nuts of a Shea tree, which is indigenous to Africa. It's chemical constituents are rich, which include unsaturated fats, essential fatty acids, antioxidants, and vitamin E and D, among other noteworthy constituents. It is considered to be "Super-Food" for your skin, and one of the best anti-aging agents available; improving wrinkles, fine lines, and scars. It is deeply moisturizing, and stimulates collagen production (what makes your skin look younger). It protects your skin from UV sunlight, harsh (cold/dry) climates, dehydration, and pollution, making it invaluable for after-sun or winter skincare. 

FDA Disclaimer: "These statements have not been evaluated by the Food and Drug Administration. This product is not intended to diagnose, treat, cure, or prevent disease."


Homemade Dish Soap


I like homemade meals better than eating out most of the time, which means I probably do more dishes than I want to admit, sigh. I hate to be negative, but I really dislike washing dishes. It makes my hands super dry and my nails brittle. Not to mention, commercial dish soap are full of so many chemicals! Not only do the chemicals damage your own health, but they hurt the environment around you where the water ends up. I wanted to find a natural dish soap recipe that actually got the job done, because, lets's face it - clean dishes are a must. I went to the store and looked at the that the "natural" soaps contained a ton of chemicals as well!
Here are some yucky soap ingredients to try and avoid, and why:
  • Surfactants -  Sodium laureth sulfate (SLES) is a common foaming agent derived from cococut. So, although it is "natural", it contains 1,4-dioxane: an established carcinogen. 1,4-dioxane is also an environmental pollutant and is suspected of being harmful to our kidneys, liver, and central nervous system.
  • Dyes - Food coloring is one of my biggest pet peeves, mainly because my son is severely allergic to red food dye. If he consumes enough of it he vomits profusely to the point of bile and near unconsciousness.  He also breaks out in hives if his skin is exposed to it. Food dyes are also known to cause behavioral issues (like ADD and ADHD) in children, and are suspected to cause cancer. They are banned in many developed countries around the world, including in the United Kingdom, Canada, and Australia. For some reason in the United States they are still used. Ugh, I digress, I could (should will) write a completely new post on this. All and all, I'm more than happy to have the products I use be colorless. 
  • Fragrance - Anything scented probably contains phthalates, which disrupts hormones. Even phthalate-free synthetic fragrances are usually petroleum-derived. 
  • Antibacterial Ingredients - Totally toxic if you see "antibacterial agent" or "triclosan" listed on the ingredients label. Known to be carcinogenic and hormone disrupting. 
To avoid all of the items above, I began researching DIY dish soap recipes.  I learned that vinegar helps to cut down on spotting, and washing soda really helps loosen food stuck to plates. I put together the concoction below.  Let me know how it works for you, or if you have a recipe you swear by. I'd love to give it a try.

Ingredients:
  • 1/4 cup warm water (distilled, filtered, or boiled water only to prevent bacteria growth)
  • 2/3 cup Dr. Bronner's Castile Soap
  • 1 tablespoon aloe vera gel
  • 1 1/2 teaspoons washing soda (different than baking soda)
  • 1 teaspoon vegetable glycerin


Essential Oils:
  • 20 drops essential oil of your choice (I used Orange)
...I enjoy using citrus oils for cleaning... 

(I only use therapeutic grade essential oils that are safe for consumption.
For more information on how to purchase these oils, please feel free to contact me.)


Instructions:
This is super simple, and I used the soap dispensing container under my kitchen sink so that I could use the solution with ease.

First, I mixed the warm water and the washing soda together, making sure that the powder was dissolved.

Then add the Castile Soap, Aloe Vera, vinegar, and vegetable glycerin. Mix until combined.

Once well combined, add twenty drops of the essential oil of your choice to the dish soap, and stir.

And that's it. Easy-Peasy! Homemade dish soap in minutes. So much less painful that it sounds.

Nerdy Extras:
I like to use citrus essential oils when cleaning, orange in particular.

Orange essential oil has a natural fresh, sweet, citrus smell. The scent alone reminds you of something freshly cleaned. The most prominent chemical constituent in orange essential oil is limonene, which makes up about 85-95% of the extract. Limonene is considered to be a powerful antioxidant and also kills bacterial. When diluted, it is a great way to clean countertops, cutting boards, or appliances without needing to use bleach or the harsh cleaning chemicals found in many products. It is also an excellent degreaser. As an added bonus, orange essential oil is excellent for supporting healthy circulation and maintaining bone and joint health, while promoting a more positive mood. So not only does it do a great job cleaning, but it has therapeutic value as well. That's a WIN-WIN in my book.

FDA Disclaimer: "These statements have not been evaluated by the Food and Drug Administration. This product is not intended to diagnose, treat, cure, or prevent disease."


How to Use Essential Oils

What good are essential oils if you don't know how to use them? It's super simple, actually, and not nearly as complicated as you might imagine.There are three different ways to experience the oils. Topically, aromatically, and internally. Each technique is unique in its own way, and there is no right or wrong way to apply them. Just go with whatever you feel most comfortable with.

Topically
Probably the most popular method for essential oil application is topically. When you apply an oil topically, it means that you are applying the oils to your skin. Essential oils are easily absorbed by the skin, and applying the oils topically provides immediate localized benefits to the area that you are applying/targeting. The oils are also absorbed into your bloodstream when used topically, so not only are the benefits localized, but beneficial to the entire body. The pores on your feet are very large and open, which make for a popular location to apply essential oils topically. Another bonus in regards to your feet, there are points on the bottom of your feet that correspond to every part of your body. You can also apply the oils to your head, ears, chest, over your heart, to the back of your neck, and/or on troubled areas.  

Aromatically
One of my favorite ways to experience oils is aromatically, or through smell. You can diffuse essential oils in the air with an electronic diffuser. Just make sure your diffuser does not omit a lot of heat, otherwise it will weaken the essential oil and reduce its potency. If you don't have a diffuser, you can always put a drop of oil in the cup of your hand and inhale, or simple inhale the scent straight from the bottle. When the oils are inhaled they go directly to brain, which has an immediate effect on our mood.

Internally
The use of essential oils internally, or ingesting them, is controversial. People either love it or hate it. To be clear, not all essential oils are to be used internally, so you do have to be careful and read the labels. I enjoy putting lemon essential oil in my water, and I use the oils in recipes quite frequently. I am also a huge fan of essential oil supplements. I know a lot of people who take the supplements daily, myself included. For me, oils in general have been life changing, but the supplements have really balanced me out. I can't say enough about them!


(I only use therapeutic grade essential oils that are safe for consumption.
For more information on how to purchase these oils, please feel free to contact me.)

FDA Disclaimer: "These statements have not been evaluated by the Food and Drug Administration. This product is not intended to diagnose, treat, cure, or prevent disease."


Scalp Stimulating Deep Conditioner


Many men and women face the unfortunate problem of thinning hair. Hair loss has many causes including aging, stress, illness, genetics, pregnancy, and menopause. The majority of shampoos and hair products out there contain synthetic materials which can also contribute to thinning hair.


For those with thinning hair, or those who generally want healthier hair, below is a list of ingredients to avoid if possible:

  • Propylene Glycol - May cause dry skin and skin irritation.
  • Sodium Lauryl Sulfate or Laureth Sulfate - Cleansing/foaming agent that may corrode hair follicles.
  • Oleyl betaine - May cause dry hair and scalp.
  • Mineral oils - Clog pores and may inhibit healthy hair follicle health.

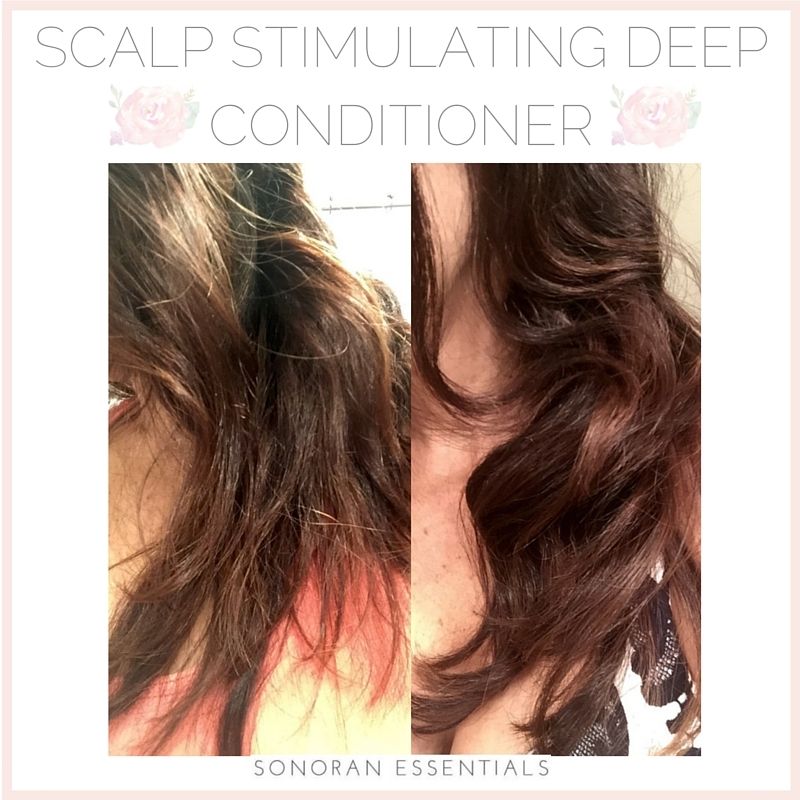
It may come as surprise to those of you who know me, but I have thinning hair. You wouldn't think so by looking at me, because thankfully I have fairly thick hair,  So far it is not very noticeable. But seriously, I lose ...SO... much hair!!! I'm pretty sure it is due to genetics in my case, but it bothers me, so I decided to try to fix my problem with an at home scalp stimulating deep conditioner. I was hesitant at first, because rubbing oil directly onto my scalp sounded like a greasy mess. I'm so glad I tried it though, because the results were amazing! My hair was not greasy at all. In fact, my hair actually had significantly more body at the root. I could see the difference after only one treatment. The shaft of my hair was so smooth and revitalized.

Below you will see a before and after picture of my hair. Both pictures were taken first thing in the morning with no product in my hair. I washed my hair at night and put my hair up in a bun, so both pictures show my hair completely natural and air dried. Don't judge me!. Pictured on the left is obviously my hair before the treatment, and pictured on the right is my hair after the treatment. My hair looked and felt so much better! Who knew homemade hair products could work so well?!


Ingredients:
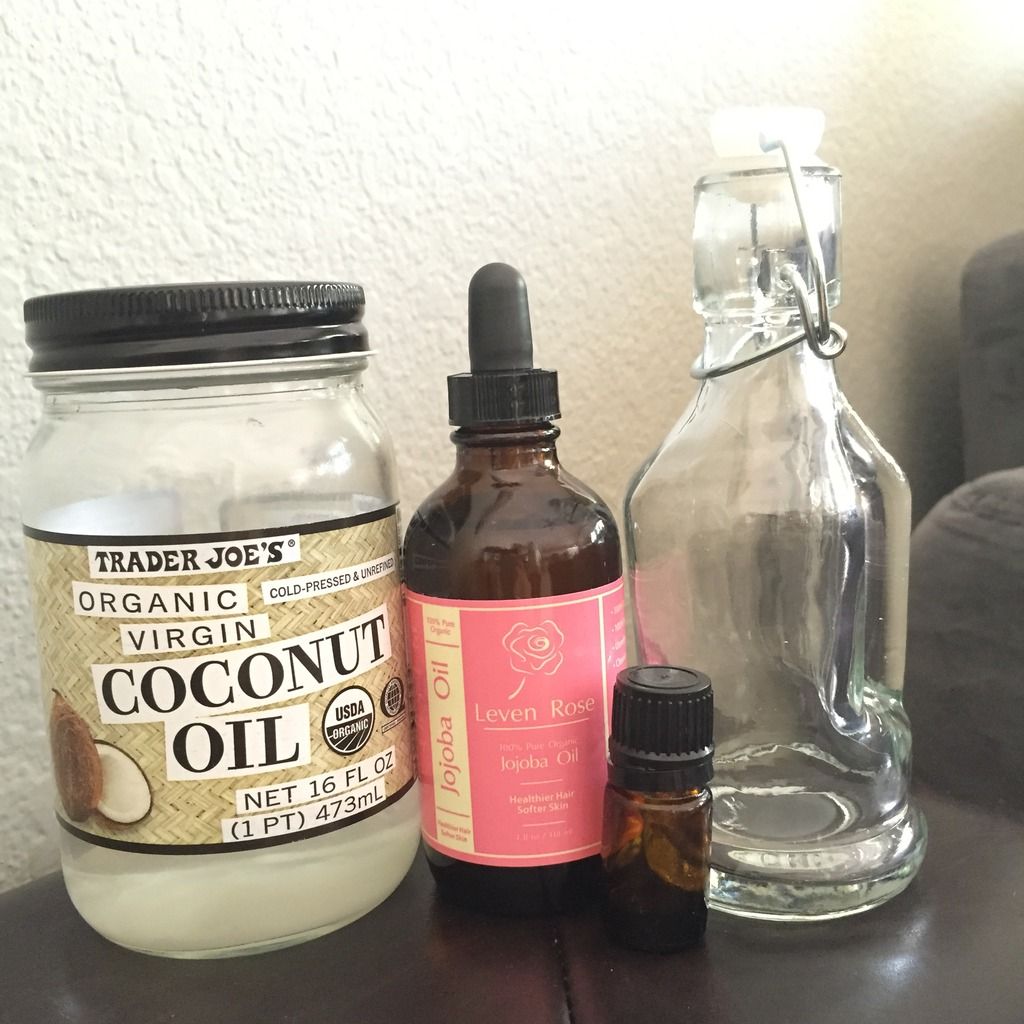
  • 6 ounces Coconut Oil
  • 3 ounces Jojoba Oil


Essential Oils:
  • 9 drops Clary Sage
  • 6 drops White Fir
  • 3 drops Rosemary
  • 3 drops Cedarwood
(I only use therapeutic grade essential oils that are safe for consumption.
For more information on how to purchase these oils, please feel free to contact me.)


Instructions:
Combine all the ingredients and blend in a blender or a food processor until well combined.

Store away from the light in an airtight container.

I like to apply the conditioner once a week on dry hair, before getting into the shower. I start by massaging small amounts of the product into my scalp. Once I feel like my scalp is saturated I apply the product very gently to the shaft of my hair. I then put my hair into a high bun and let is sit for a minimum of thirty minutes. Once I'm ready, I get into the shower and shampoo and condition my hair like usual.

There you have it! An easy and effective homemade conditioning treatment for pennies on the dollar!

Nerdy Extras:
Coconut Oil is an excellent conditioner for the hair and helps in the re-growth of damaged hair. It is made up of saturated fats, vitamin E, vitamin K, and Iron. It also softens the hair and conditions the scalp.

Jojoba Oil loosens and removes hardened build up on the scalp. Many scalp related problems, including hair loss, are caused by a hardened build up of sebum on the scalp which clogs hair follicles and creates scaling. If the build up is not removed, it can eventually interfere with the hair follicles ability to function properly. This is why jojoba oil makes such a fantastic base for do it yourself hair treatments; it cleans the hair follicles and allows the hair to function normally. Additionally, jojoba oil won't make your hair greasy if you have oily hair, as it naturally regulates the amount of sweat your hair follicles are emitting. Many people assume because they have an oily scalp they don't need to condition it. This is not the case, and the reason why many people with oily hair have flaky scalps. Jojoba oil also is an excellent moisturizer for dry hair. It really is great for all hair types.

Clary Sage is a very interesting essential oil with many uses. In this case, it strengthens hair follicles, which significantly reduces the amount of hair loss.

White Fir Essential Oil is said to have natural cortisone-like effects that often stimulate hair regrowth.

Rosemary Essential Oil stimulates the hair follicle; which as a result enables the hair to grow longer and stronger. It has been known to help treat and prevent dandruff and flaky scalps.

Cedarwood Essential Oil reduces dryness and hair loss by promoting healthy hair.

FDA Disclaimer: "These statements have not been evaluated by the Food and Drug Administration. This product is not intended to diagnose, treat, cure, or prevent disease."


Natural Brow & Lash Enhancement

Once upon a time I would over-pluck my eyebrows. I have fairly thick eyebrows naturally, and of course always wanted them thinner. The grass is always greener, right? Anyway, I have been trying to grow my eyebrows back out for years. I had been penciling in little bald spots in my eyebrows to give them good shape. Then I stumbled upon a little beauty secret; castor oil. Castor oil not only helps regrow eyebrows, but it also helps lengthen your eyelashes as well. It is very inexpensive, all natural, and extremely effective. Some people are turned off by it because it tends to be a little thick and sticky. I don't mind, because it actually works!!! I've been using it for a few months now, and I no longer have to pencil in my eyebrows! I was in shock after I got my eyebrows waxed last time. There was no lecture on letting them grow out. They looked perfect! My lashes are even starting to get longer. Woo-hoo!


Ingredients:
  • 1 1/4 teaspoon Castor Oil
  • 1/4 teaspoon Vitamin E (or approximately 5 capsules)


Essential Oils:
  • 4 drops Lavender Essential Oil
  • 4 drops Rosemary Essential Oil
(You could also omit the essential oils, and still get excellent results with the Castor Oil.
I only use therapeutic grade essential oils that are safe for consumption.
For more information on how to purchase these oils, please feel free to contact me.)


Instructions:
Acquire some clear empty mascara containers. You could always just up-cycle your old mascara tubes and wash them out really well. Another option is you could use an empty jar and a disposable mascara wand. If you choose to go that route, make sure you store the wand somewhere sanitary. In my opinion, it was just so much easier and much more sanitary to buy the containers.

Add the castor oil and vitamin E oil to the empty mascara container and stir gently. Depending on the size of the container you are using, the measurements I listed are to be used loosely. The container should not be more than half full, otherwise it will overflow.

Put in the essential oils, if you have them, and stir gently.

Remember, consistency is the key! Apply once daily for optimum results. I apply the serum at the end of my night-time beauty routine on clean dry lashes. I brush the serum on like I would mascara, and apply to the top and bottom lashes. Then I use the same wand and brush my eyebrows with it. Making sure to remove any excess product, as the eyebrows need less product than eyelashes.

And you're done! You now have your own homemade eyelash and eyebrow growth serum!

Nerdy Extras:
Castor Oil is a natural source of vitamins (including vitamin E), minerals, proteins, and fatty acids that help lengthen and thicken hair. It also helps, soften, moisturize, and seal hair. It is high in ricinoleic acid, which has natural anti-bacterial and anti-fungal properties. This helps keep fungus or bacteria from inhibiting hair growth. It is also able to penetrate the pores and follicles that produce hair.

Vitamin E provides additional fatty acids and antioxidants to help speed hair growth. It also acts as a natural preservative by extending the shelf life of homemade products.

Lavender Essential Oil is helpful in minimizing hair breakage and promoting hair growth.

Rosemary Essential Oil supports healthy hair growth and strength by stimulating the hair follicles. 

FDA Disclaimer: "These statements have not been evaluated by the Food and Drug Administration. This product is not intended to diagnose, treat, cure, or prevent disease."


Instant Sunburn Relief

I know summer is winding down, but the warm season is still upon us. The temperatures have been at an all time high in so many areas this summer. Here in Scottsdale, the UV index is very high, & sunburns can occur quickly if you are not careful. 

Here is a super simple tip most of us already know: Aloe Vera is a great treatment for sunburn!

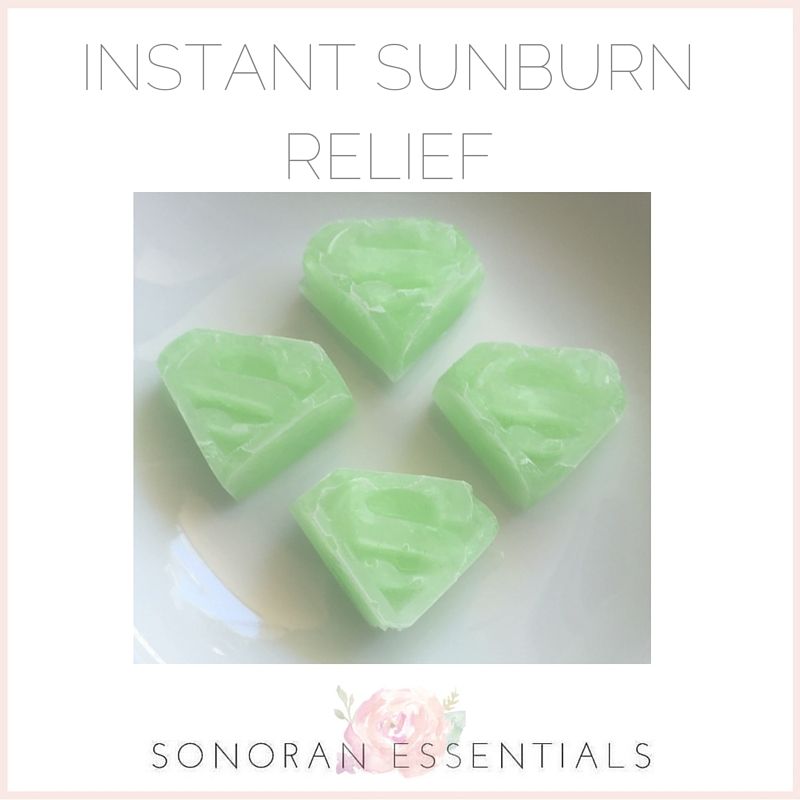
Try these simple frozen Aloe Vera cubes to help relieve those painful sunburns. The cold cubes help pull heat from the damaged skin, while the aloe soothes your sensitive sunburn.


Ingredients:
  • Aloe Vera Gel
Essential Oils:
  • Lavender 
Using the Lavender essential oil is completely optional. I omitted it in this recipe to save time. 
I only use therapeutic grade essential oils that are safe for consumption.
For more information on how to purchase these oils, please feel free to contact me.)

Instructions:
Using Aloe Vera in gel form, gently squeeze from bottle into ice cube trays.

A little bit of Aloe goes a long way, so use smaller silicone trays, if possible.
If you don't have any, just fill a traditional ice cube tray up about 1/4 of the way.

Place trays in freezer and leave in for a few hours, preferably overnight.

That's it, super simple!

Once frozen, you can store them in a plastic freezer bag and keep them frozen until needed.

When removing the cubes from the freezer, try and move fast. The Aloe melts pretty quickly.

You'll now have some soothing Aloe Vera gel ice cubes in the freezer waiting for you the next time you need instant relief from a sunburn.

If you want to add lavender essential oil to the gel you can add two drops of lavender to about a cup of Aloe Vera gel (in a glass or metal bowl), mix ingredients together, then spoon into the tray.

Nerdy Extras:

Aloe Vera Gel is an herbal remedy that naturally uses the plants moisturizing properties to soften the skin.

Using Lavender Essential Oil for sunburn can help ease the pain and assist your skin in the healing process.

A sunburn can be a nuisance, but in most cases it can be easily soothed with cold compress and aloe. However, even the most minor of sunburns can cause serious long-term damage to your skin. Your chances for Melanoma (the most serious form of skin cancer) increase by 80%  if you sustain five or more sunburns in the same area, especially during youth. The best way to avoid sunburn is to wear sunblock and reapply as often as the manufacturer recommends, if not sooner. You can also protect your body from the sun with hats and protective clothing.

If not careful, sunburns can be severe. If your skin is blistered, accompanied by a fever, or does not seem to improve within a few days, you may need to seek medical attention. Your doctor may want to you start treating the sunburn with a corticosteroid cream, or possibly prednisone. 

FDA Disclaimer: "These statements have not been evaluated by the Food and Drug Administration. This product is not intended to diagnose, treat, cure, or prevent disease."


Homemade Puppy Shampoo


Happy National Dog Day! I recently got a Boston Terrier puppy. Her name is Lucy. She is so sweet and makes my life so much more joyful (potty training aside, haha). It's crazy how one tiny little puppy can literally transform the mood in my home for the better. After making the move out to the gorgeous Sonoran Desert, things got a little complicated. Everyone in my home was homesick in just about every way. Then little Ms. Lucy came along and turned things around. She has been a total Godsend. I had been wanting to test out my essential oils and homemade products on pets, so I thought making a DIY puppy shampoo would be the perfect way to jump start my new interest.

The shampoo worked so much better than I expected!
Her coat was so soft and shiny and she smelled great! 

Ingredients:
  • 1 cup water
  • 1/3 cup oatmeal
  • 1 tablespoon Dr. Bronner's Liquid Castile Soap
  • 1 tablespoon apple cider vinegar
  • 1/4 teaspoon of vitamin E (or approximately 5 capsules)


Essential Oils:
  • 3 drops Peppermint
  • 2 drops Lavender
  • 2 drops Cleansing Blend
  • 1 drop Cedarwood
(You could potentially omit the essential oils.
Although, in my opinion, it is what makes this recipe so amazing.
I only use therapeutic grade essential oils that are safe for consumption.
For more information on how to purchase these oils, please feel free to contact me.)


Instructions:
Add the oatmeal to a blender and mix until it becomes a powder consistency.

Heat the water up until it is very warm. Add the hot water to the oat powder inside the blender. Mix until well combined. Let it sit for a few minutes, until it thickens.

Add castile soap, apple cider vinegar, and vitamin E to the blender. Mix until combined.

Put the essential oils in the mix, again, blending until combined.

Pour finished shampoo into a glass jar to store.

Apply a quarter sized drop over dog and massage into coat, leaving on your pup for as long as they will tolerate it, or about five minutes. Be sure to rinse well.

Nerdy Extras:
Oatmeal is great for your dogs coat. It has many vitamins and minerals that helps their skin heal faster. It can help soothe skin irritations and itchiness, making it an excellent choice for dogs battling hot spots, eczema, and psoriasis. Living in the desert, the humidity is generally pretty low, so dogs around here can get pretty dry and flaky. Oatmeal helps battle that by moisturizing, cleansing, and softening your dogs coat.

Castile Soap has so many uses, but as a dog shampoo it helps to remove dirt, oil, and even pests. It is very gentle on sensitive skin and great for dogs who have itching issues.

Apple Cider Vinegar helps to clean your dogs coat/skin. Bonus - It is also a natural flea repellent!

Vitamin E can help support the skin of your dog by reducing flakiness. It also promotes a healthy, glossy looking coat.

Peppermint Essential Oil is excellent at repelling insects and supporting healthy circulation.

Lavender Essential Oil is a very safe and gentle oil to use on your dog. Our veterinarian even diffuses it in her office for the dogs in there.

Cleansing Blend Essential Oil Blend is great at neutralizing odors and soothing skin irritations.

Cedarwood Essential Oil is a natural antiseptic and flea repellent. It helps with circulation and is a powerful coat conditioner. 

FDA Disclaimer: "These statements have not been evaluated by the Food and Drug Administration. This product is not intended to diagnose, treat, cure, or prevent disease."


Homemade Strawberry Syrup

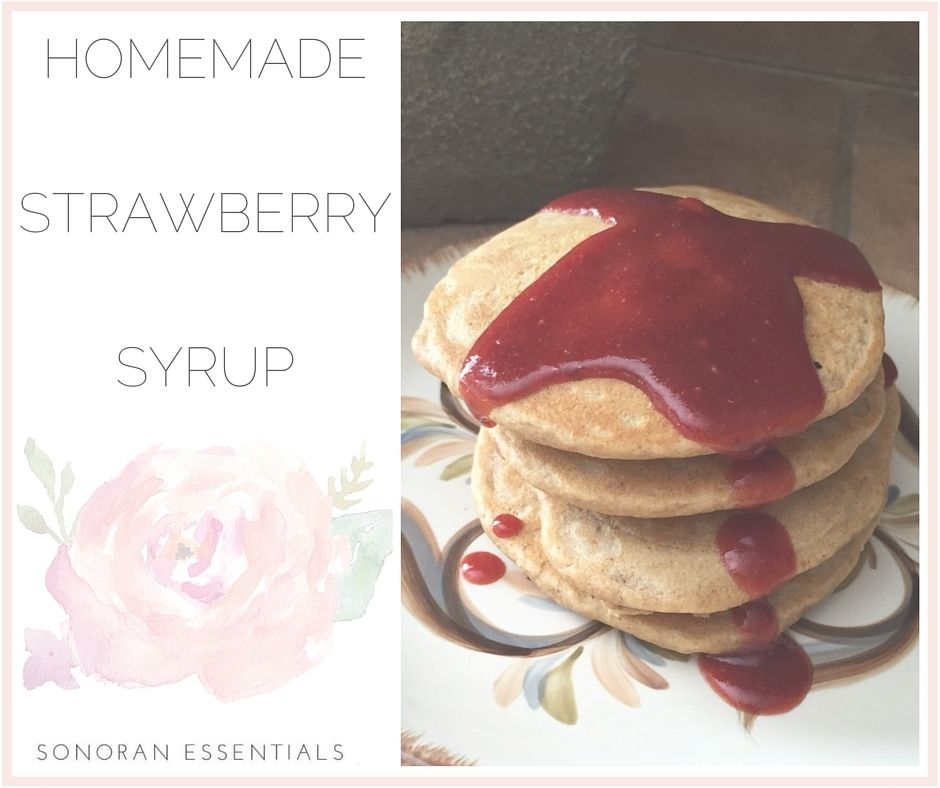
Mid-week pick me up? Yes please! A short stack of fluffy pancakes topped with some delicious homemade strawberry syrup fit the bill perfectly! One bite and all of my worries were long forgotten. Well, for that moment anyway, haha. Traditionally paired with waffles, crepes, and french toast; this sauce would also be great drizzled over a bowl of yogurt. A total treat when topped over ice-cream, or even better - an ice cream brownie sundae or a decadent slice of cheesecake. You could also use the syrup to flavor milk, smoothies, or even a cocktail. The options are practically limitless! 

Ingredients:
  • 2 cups strawberries, preferably organic
  • 1 cup brown sugar
  • 1 cup water
  • 1/4 teaspoon vanilla extract


Essential Oils:
  • 1 drop of Lemon
(You could also substitute lemon extract for the lemon essential oil.
I only use therapeutic grade essential oils that are safe for consumption.

For more information on how to purchase these oils, please feel free to contact me.)

Instructions:
First, you are going to need to rinse, hull, and dice your strawberries.

Combine strawberries, sugar, and water in a medium saucepan over high heat.

Bring the strawberry mixture to a boil, then reduce to a gentle simmer; Stirring occasionally.

Cook for about 15 minutes, or until syrup is thickened.

Remove from heat and add the vanilla extract and lemon essential oil.

Transfer to a blender, turn it on, and go. I used the "Syrups" button on my Blendtec. Easy.

Serve warm on pancakes and the like, but make sure to cool completely before adding them to drinks or over ice-cream.

Nerdy Extras:
Although not totally necessary, I highly recommend using organic strawberries. I know organic strawberries cost more, but it's a price worth paying! Studies show that organic strawberries have significantly higher levels of antioxidants, last longer, look better, and even taste better. I would have to agree.

Strawberries are considered by many to be one of the healthiest fruits. They are packed with antioxidants, lower blood pressure, and protect your heart. Research has shown that strawberries help burn stored fat, boost short term memory, and ease inflammation. They are a great diet food; low in calories and high in fiber. They are high in nitrates, which promote blood flow and oxygen in our bodies, which is also excellent for weight loss. Strawberries also help to strengthen hair and nails and prevent our skin from sagging. They also contain potassium, vitamin K, and magnesium which are important in bone health and a healthy nervous system.

Lemon Essential Oil is a powerful antioxidant, and can help ward off free radicals. It has been known to aid in digestion, help support healthy respiratory function, and to promote a positive mood and cognitive ability.  

FDA Disclaimer: "These statements have not been evaluated by the Food and Drug Administration. This product is not intended to diagnose, treat, cure, or prevent disease."