Showing posts with label Natural. Show all posts

Pan Fried Tilapia w/ Lemon Cream Sauce


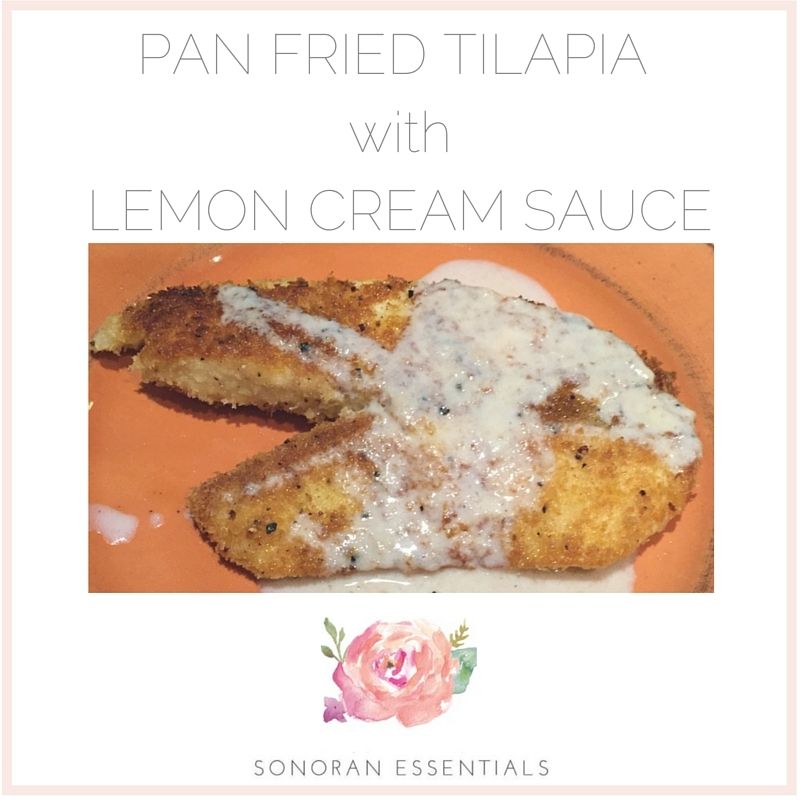
Food is definitely one of my favorite things to blog about. Lemon essential oil in a cream sauce over crunchy fish? Yes please! I discovered this incredibly delicious dinner recipe at mamalovesheroils.com. I don't typically fry my fish, as it's not the healthiest option, but this recipe is a winner. My picky children actually love how this fish is prepared, and don't hesitate to eat every bite. That alone makes this recipe a keeper! It also doesn't require a ton of ingredients and it is easy to prepare; a bonus for us busy families.

Ingredients:
  • 4 tilapia fillets
  • 1 egg
  • 1 cup milk
  • 1 cup panko bread crumbs
  • 1/4 cup olive oil
  • 4 tablespoons flour
  • 3 tablespoons butter
  • 2 teaspoons lemon pepper seasoning
  • 1/4 teaspoon onion powder
  • salt & pepper, as needed


Essential Oils:
  • 10 drops of Lemon Essential Oil
(You could also substitute lemon juice for the essential oils.
I only use therapeutic grade essential oils that are safe for consumption.
For more information on how to purchase these oils, please feel free to contact me.)

Instructions:
Heat olive oil in skillet on medium heat.

In a shallow dish, combine 2 tablespoons flour, lemon pepper, panko, and salt & pepper if needed.

Whisk the egg in a separate dish.

Dip the fish in the whisked eggs, then coat the fish with the panko mixture and add to frying pan.

Cook for 3 minutes, then flip at cook for an additional 2-3 minutes until golden brown.

Transfer to a paper towel lined plate to cool.

To make the cream sauce, melt butter in a saucepan over medium heat.

Add 2 tablespoons flour and cook for one minute, or until filly combined.

Add the milk, onion powder, lemon essential oil, salt & pepper.

Cook for an additional 2-3 minutes, or until sauce thickens, stirring constantly.

Serve fish with lemon cream sauce drizzled over top with a side of veggies. 

Nerdy Extras:
Lemon Essential Oil is a powerful antioxidant, and can help ward off free radicals. It has been known to aid in digestion, help support healthy respiratory function, and to promote a positive mood and cognitive ability.

FDA Disclaimer: "These statements have not been evaluated by the Food and Drug Administration. This product is not intended to diagnose, treat, cure, or prevent disease."

Immune Enhancing Pumpkin Smoothie


Forget about the Pumpkin Spice Latte, and try this smoothie instead! It has all of the traditional flavors of Fall, only with an added immune enhancing element. And, let's be honest, who doesn't need a little extra immunity this time of year?!

Ingredients:

  • 1 cup almond milk (or milk of choice)
  • 1/2 cup pumpkin puree
  • 1/2 cup vanilla yogurt
  • 2 semi-frozen bananas
  • 1 teaspoon vanilla extract
  • 1 teaspoon pumpkin pie seasoning
  • 1 cup ice
   

Essential Oils:
2-3 drops Protective Blend

Instructions:
Place all ingredients into blender and blend until smooth.

Nerdy Extras:
Almond Milk is cholesterol free which can help enable a healthy heart. It can also aid in maintaining and lowering blood pressure.1

Pumpkin is a source of beta-carotene. It can help reduce risk of getting heart disease & asthma.2

Bananas have a significant amount of potassium. Consuming potassium and lowering your sodium intake can help reduce the risk of cardiovascular disease and heart disease. They are also helpful when fighting off viruses because they are easily digested and can provide necessary nutrients without upsetting the stomach.3

Protective Blend Essential Oil helps to support healthy immune function & is full of antibacterial properties. It's a blend made up of orange, clove, cinnamon, eucalyptus, & rosemary essential oils.

References:
1 https://www.organicfacts.net/health-benefits/almond-milk.html
2 http://www.medicalnewstoday.com/articles/279610.php; http://www.livingwithasthma.net/fall-favorite-asthma-pumpkins-carving/
3 http://www.livestrong.com/article/505406-top-ten-health-benefits-of-bananas/; http://www.medicalnewstoday.com/articles/271157.php

FDA Disclaimer: "These statements have not been evaluated by the Food and Drug Administration. This product is not intended to diagnose, treat, cure, or prevent disease."

Banana-Peanut Butter Cookies


Occasionally I receive a small recipe booklet in the mail from Ralph's grocery store. It's actually one of the few random mailers I like. Ralph's (or Fry's here in Arizona) has done a lot over the years to appeal to the more health conscious customers. When they came out with a few breakfast cookie recipes, you know I was game!

Cookies for breakfast you say? That doesn't sound very healthy. Well, surprisingly, they are! At least in my opinion anyway. It may not be conventional, but can be a well-balanced start to you day. Especially when you pair them with fruit, a smoothie, or some yogurt. Even the ingredients on their own are healthy - whole wheat flour and oats add fiber to your diet, while peanut butter adds protein and healthy fats which help you to stay full and avoid snacking.

Prep Time: 10 minutes | Bake Time: 10-15 minutes | Total Time: 20-25 minutes
Makes About 12 cookies

Ingredients:
  • 1 large, ripe banana, mashed
  • 1 cup oats
  • 1/2 cup crunchy peanut butter
  • 1/2 cup whole-wheat flour
  • 1/3 cup brown sugar
  • 1/4 cup low-fat milk
  • 1 teaspoon vanilla extract
  • 1/4 teaspoon baking soda 


Instructions:
Preheat oven to 350 degrees Fahrenheit.

Lined baking sheet with parchment paper.

Combine peanut butter and banana in a bowl until smooth and blended.

Add sugar, vanilla, oats, flour, milk, and baking soda. Mix until blended.

Drop cookies by heaping spoonful onto cookie sheet, leaving 2 inches between cookies.

Gently flatted the cookies into little discs.

Transfer to the oven and bake for 10-15 minutes, or until the edges begin to brown.

Let cookies cool completely before removing from baking sheet.

Serve immediately or store in airtight container in the refrigerator. 


FDA Disclaimer: "These statements have not been evaluated by the Food and Drug Administration. This product is not intended to diagnose, treat, cure, or prevent disease."

Remineralizing Toothpaste


After having some surprisingly bad news at the dentist, I was looking for a re-mineralizing toothpaste to help with tooth decay and dental regeneration. I wanted something that was fluoride-free, glycerin-free, preservative-free, and free of foaming agents and artificial coloring and flavoring. I found a brand of toothpaste called Earthpaste that fit the bill.

I noticed the toothpaste only had a few very basic and natural ingredients. So I got to thinking, this is unbelievably simple. Why can't I make this myself? So I gave it a try. The results have been amazing. I fiddled around with the recipe a bit, and ended up with one I'm sharing with you today after some trial and error. I just love the way it makes your mouth feel so clean. It is smooth and creamy, but not too thick. My teeth seem whiter and are not as sensitive to cold and heat. I have yet to go to a checkup at the dentist, but I will update you all when I have more to share on that.

This toothpaste is even kid-approved. My 6 year old doesn't want to use any other toothpaste now. I'm happy because, well I'm frugal - and I'm saving a ton of money on toothpaste. Like most DIY's, startup costs can be a little steep, but in the long run it ends up only costing a fraction of the amount.

Prevention is everything, and good oral hygiene, a healthy diet, and eating less sugar is obviously the best way to avoid a cavity. If you think you have a cavity, go to the dentist and get checked out. This recipe is not meant to replace proper dental care. I am simply using it as a more natural means to clean my teeth, and in hopes that the small problems I am currently having with my teeth can be resolved over the next few months before my next 6 month checkup.

Ingredients:
  • 1/4 cup of Redmond (bentonite) Clay
  • 1/4 cup of boiling distilled water
  • 1 tablespoon of coconut oil
  • 1/4 teaspoon of Real Salt
  • 1/2 teaspoon of xylitol


Essential Oils:
  • 15 drops of Protective Blend Essential Oil
  • 10 drops of Peppermint Essential Oil
(I only use therapeutic grade essential oils that are safe for consumption.
For more information on how to purchase these oils, please feel free to contact me.)

Instructions:
  • Using a glass container, bring water to a boil
  • Add the salt and xylitol, stirring until the ingredients have been completely dissolved.
  • Add the coconut oil, stirring until the mixture becomes a liquid.
  • Add the bentonite clay, stirring until well combined.
  • Let cool completely
  • Add your essential oils last, and stir.
  • You can prepare this in the glass container you plan on storing the toothpaste in. Or you can pour mixure into smaller glass jars, so that each person in your home as an individual jar of their own toothpaste.
  • To use the toothpaste, simply dip your toothbrush in the jar and apply a small amount to bristles. Or if it sounds better, use a small wooden spoon to apply to your toothbrush instead.
WARNING: You are never supposed to use metal utensils with bentonite clay
because the metals can leach from the utensils and be pulled into the clay.

Nerdy Extras:
Bentonite Clay draws toxins, chemicals, impurities, and heavy metals from the gut, skin, and mouth, The clay absorbs the liquids that it comes into contact with, and expands to extract the toxins from the liquid. It is composed of many minerals including calcium, magnesium, silica, sodium, copper, iron, and potassium. When used in toothpaste, the clay binds to unhealthy substances in the mouth, such as around the teeth and on the tongue and gums, and helps remove them before you swallow them and become sick. For these reasons, along with its high antibacterial properties, it is the most beneficial ingredient in this re-mineralizing toothpaste.

Coconut Oil is effective in getting rid of viruses and bacteria in mouth.

Real Salt is unrefined and full of natural minerals.

Xylitol is a natural sweetener derived from the fibrous parts of plants. It does not break down like sugar and can help keep a neutral pH level in the mouth. It also prevents bacteria from sticking to the teeth. This is how it protects the teeth from tooth decay.

Protective Blend Essential Oil is full of antibacterial properties and is known for eliminating germs and helping reduce cavities. 

Peppermint Essential Oil has many properties including antibacterial, anti-carcinogenic, anti-inflammatory, antiseptic, and antiviral. It has been proved to be more effective at preventing dental plaque formation than your typical antiseptic.1

References
1. Rasooli I, Shayegh S, Taghizadeh M, Astaneh SD (2008 Sep.) "Phytotherpeutic prevention of dental biofilm formation," Phytother Res. 22(9):1162-7

FDA Disclaimer: "These statements have not been evaluated by the Food and Drug Administration. This product is not intended to diagnose, treat, cure, or prevent disease."


Hard Lotion Bars


I was initially inspired to make these lovely hard lotion bars due to the very hot and dry weather here in Arizona. My skin is naturally on the dry side, so living out here just made it worse. I needed a lotion that was able to keep my arms, legs, hands, and feet looking moisturized all day long. These little bars do exactly that! Now, I warn you, this is not a light moisturizer. This is a very heavy moisturizer, and a little bit goes a long way. I tend to have sensitive skin with certain lotions, but this lotion has yet to give me any problems after having used it for months. That being said, I'm clearly a big fan of these powerful little lotion bars. I liked them so much that I thought they would make great gifts, so that's exactly what I did. I really enjoy making homemade products, it's a lot of fun to me. Sure, it may take more time, but it's so original and you can really customize your products based on the needs of the person you are making it for.  Plus, it's economical once you are all stocked up on all of your basic DIY materials.

Shea Butter is a softer butter, so these bars will be a little softer, which is why I recommend storing them in the refrigerator until ready to use. Especially if you live somewhere hot like me! The beeswax smell does tend to overpower the smell of the oils. Despite lacking an aroma, the essential oils are still in there, providing the same level of therapeutic value.


Before you embark on this DIY mission, you are going to need a silicone treat mold, This recipe makes 2-3 dozen mini lotion bars, depending on the size of the mold. I recommend sticking to smaller mold sizes. I also recommend not making thin lotion bars, as they will not hold up well when applying them.

Ingredients:
  • 2/3 cup Beeswax 
  • 1/2 cups Coconut Oil
  • 1/2 cup Shea Butter 
  • 1 teaspoon Vitamin E Oil (approximately 4 capsules)
 

Essential Oils:
  • 20 drops of an essential oil of your choice.
...Lavender, peppermint, and citrus are always popular choices...
(I only use therapeutic grade essential oils that are safe for consumption.
For more information on how to purchase these oils, please feel free to contact me.)
Instructions:
  • Measure the beeswax, coconut oil, shea butter, and vitamin E in a glass jar. I used a glass Pyrex container, but anything glass or metal would work just fine.
  • Fill pan with about two inches of water. Bring to a boil. 
  • Place Pyrex container with ingredients into the boiling water. This is an important step. You want to do this to avoid having the ingredients get too hot, or use a double boiler.
  • Bring heat down to a simmer. You don't want to overcook the lotion.
  • Stir ingredients until combined. Should take about 10-20 minutes. I used a wood craft (Popsicle) stick to stir, so that I could just toss it in the trash when done.

  • Once the lotion has been melted, remove it from the heat, and let it sit until the glass jar is no longer hot to the touch. Approximately 2-3 minutes.
  • When the lotion is cooled, add about 20 drops of essential oil and stir.
  • You could do one of two things here. You could pour the lotion directly into the silicone mold, or you could do what I did and pour the lotion into a wide mouth squeeze bottle (like this). It was so much easier to just squirt the lotion into the molds this way. Clean up was a breeze, too.
  • Once all of your molds are filled, let them harden for at least 3 hours, preferably in the refrigerator.
  • Remove the bars from the tray, and place them in a glass jar or ziplock bag in the refrigerator until ready to use. You could also store them at room temperature if you live in a cooler climate. 
  • When you are ready to use the lotion bars, simply rub them on the areas of your skin needing extreme moisture. 

Nerdy Extras:
Beeswax acts as a surfactant, meaning it acts as a barrier on the skin when blended into a cream or lotion. This barrier protects the skin from irritants, while still allowing the skin to breathe.

Coconut oil is a wonderful, and wildly popular, all-natural base for many DIY skincare and wellness practices. When applied to the skin, it absorbs into your skin and connective tissues, keeping them strong and supple, thus helping to reduce the sign of aging. It also helps exfoliate the outer dead layers of skin, making skin appear smoother.

Shea butter is extracted from the nuts of a Shea tree, which is indigenous to Africa. It's chemical constituents are rich, which include unsaturated fats, essential fatty acids, antioxidants, and vitamin E and D, among other noteworthy constituents. It is considered to be "Super-Food" for your skin, and one of the best anti-aging agents available; improving wrinkles, fine lines, and scars. It is deeply moisturizing, and stimulates collagen production (what makes your skin look younger). It protects your skin from UV sunlight, harsh (cold/dry) climates, dehydration, and pollution, making it invaluable for after-sun or winter skincare. 

FDA Disclaimer: "These statements have not been evaluated by the Food and Drug Administration. This product is not intended to diagnose, treat, cure, or prevent disease."


Homemade Puppy Shampoo


Happy National Dog Day! I recently got a Boston Terrier puppy. Her name is Lucy. She is so sweet and makes my life so much more joyful (potty training aside, haha). It's crazy how one tiny little puppy can literally transform the mood in my home for the better. After making the move out to the gorgeous Sonoran Desert, things got a little complicated. Everyone in my home was homesick in just about every way. Then little Ms. Lucy came along and turned things around. She has been a total Godsend. I had been wanting to test out my essential oils and homemade products on pets, so I thought making a DIY puppy shampoo would be the perfect way to jump start my new interest.

The shampoo worked so much better than I expected!
Her coat was so soft and shiny and she smelled great! 

Ingredients:
  • 1 cup water
  • 1/3 cup oatmeal
  • 1 tablespoon Dr. Bronner's Liquid Castile Soap
  • 1 tablespoon apple cider vinegar
  • 1/4 teaspoon of vitamin E (or approximately 5 capsules)


Essential Oils:
  • 3 drops Peppermint
  • 2 drops Lavender
  • 2 drops Cleansing Blend
  • 1 drop Cedarwood
(You could potentially omit the essential oils.
Although, in my opinion, it is what makes this recipe so amazing.
I only use therapeutic grade essential oils that are safe for consumption.
For more information on how to purchase these oils, please feel free to contact me.)


Instructions:
Add the oatmeal to a blender and mix until it becomes a powder consistency.

Heat the water up until it is very warm. Add the hot water to the oat powder inside the blender. Mix until well combined. Let it sit for a few minutes, until it thickens.

Add castile soap, apple cider vinegar, and vitamin E to the blender. Mix until combined.

Put the essential oils in the mix, again, blending until combined.

Pour finished shampoo into a glass jar to store.

Apply a quarter sized drop over dog and massage into coat, leaving on your pup for as long as they will tolerate it, or about five minutes. Be sure to rinse well.

Nerdy Extras:
Oatmeal is great for your dogs coat. It has many vitamins and minerals that helps their skin heal faster. It can help soothe skin irritations and itchiness, making it an excellent choice for dogs battling hot spots, eczema, and psoriasis. Living in the desert, the humidity is generally pretty low, so dogs around here can get pretty dry and flaky. Oatmeal helps battle that by moisturizing, cleansing, and softening your dogs coat.

Castile Soap has so many uses, but as a dog shampoo it helps to remove dirt, oil, and even pests. It is very gentle on sensitive skin and great for dogs who have itching issues.

Apple Cider Vinegar helps to clean your dogs coat/skin. Bonus - It is also a natural flea repellent!

Vitamin E can help support the skin of your dog by reducing flakiness. It also promotes a healthy, glossy looking coat.

Peppermint Essential Oil is excellent at repelling insects and supporting healthy circulation.

Lavender Essential Oil is a very safe and gentle oil to use on your dog. Our veterinarian even diffuses it in her office for the dogs in there.

Cleansing Blend Essential Oil Blend is great at neutralizing odors and soothing skin irritations.

Cedarwood Essential Oil is a natural antiseptic and flea repellent. It helps with circulation and is a powerful coat conditioner. 

FDA Disclaimer: "These statements have not been evaluated by the Food and Drug Administration. This product is not intended to diagnose, treat, cure, or prevent disease."